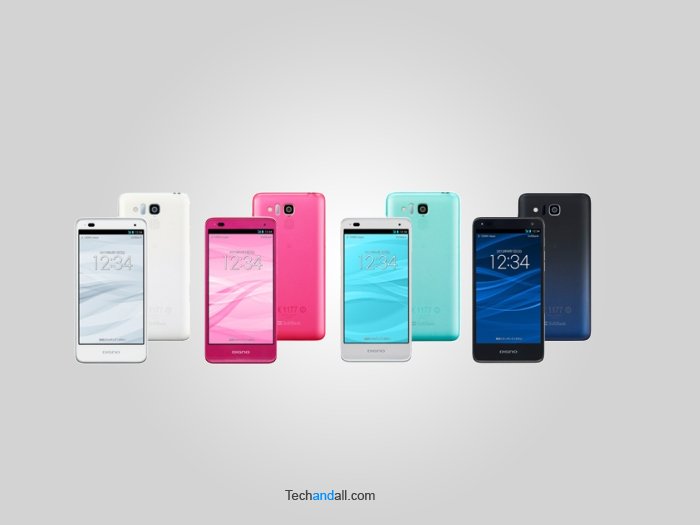
When Emma finally held her brand-new Kyocera Digno phone, she was eager to explore all its features. It was her first smartphone in years, and she was ready to embrace the technology. However, as she unboxed the device, she realized that setting it up was not as straightforward as she had hoped. With determination, Emma decided to navigate the setup process independently, turning what could have been a daunting task into an exciting adventure.
Like Emma, many users are in a similar situation when setting up their new phones. Whether a Kyocera Digno or any other model, the initial setup can seem overwhelming. But with the proper guidance, anyone can easily navigate this process and enjoy their device’s full potential. This guide is designed to help you quickly set up your Kyocera Digno phone, ensuring you get the most out of your new device right from the start.
In this comprehensive guide, we’ll walk you through every step of the setup process, from inserting your SIM card to configuring your settings and optimizing your phone for daily use. Whether you’re tech-savvy or a beginner, this guide will give you the knowledge and confidence to set up your Kyocera Digno phone without hassle.
Unboxing Your Kyocera Digno Phone
Unboxing your new Kyocera Digno phone is an exciting experience. Here’s what you need to do first:
- Check the Contents: Ensure that the box contains all the necessary items, including the phone, charger, USB cable, user manual, and additional accessories.
- Inspect the Phone: Examine the phone for any physical damage or defects. If you notice anything unusual, contact the retailer immediately.
- Charge the Battery: It is a good idea to charge the battery entirely before turning on your phone. This helps ensure that the battery is calibrated correctly from the start.
Inserting the SIM Card and SD Card
The next step is to insert your SIM card and, if needed, an SD card for additional storage.
Steps to Insert the SIM Card:
- Locate the SIM Tray: The SIM tray is usually on the phone’s side. Use the SIM ejector tool provided or a small pin to open the tray.
- Insert the SIM Card: Place the SIM card in the tray, ensuring it is aligned correctly with the gold contacts facing down.
- Reinsert the Tray: Push the tray back into the phone until it clicks into place.
Steps to Insert the SD Card:
- Locate the SD Card Slot: Depending on your model, this may be within the SIM tray or in a separate slot.
- Insert the SD Card: Slide the SD card into the slot with the gold contacts facing down.
- Secure the Slot: Secure the SD card firmly in place and secure the slot or tray.
Powering On the Phone
After inserting the SIM and SD cards, it’s time to power on your Kyocera Digno phone.
- Press the Power Button: Hold down the power button on the phone’s side until the screen lights up.
- Initial Boot: The phone will go through its initial boot process, displaying the Kyocera logo.
- Language Selection: Once the phone is powered on, you’ll be prompted to select your preferred language.
Connecting to Wi-Fi
Connecting to a Wi-Fi network is essential for downloading updates and apps during setup.
- Select Wi-Fi Network: During the initial setup, your phone will prompt you to connect to a Wi-Fi network. Choose your network from the list.
- Enter Password: Input the Wi-Fi password and click “Connect.”
- Confirm Connection: Once connected, the Wi-Fi icon will appear on the top of the screen.
Google Account Setup
You must set up a Google account to fully utilize your Kyocera Digno phone.
- Sign In: If you already have a Google account, enter your email and password. If not, follow the on-screen instructions to create a new account.
- Syncing: Decide which services and data you want to sync with your phone, such as contacts, emails, and apps.
- Google Services: Review the available Google services, such as backup and restore location services. Based on your preferences, enable or disable these services.
Software Updates
Keeping your phone’s software up-to-date is crucial for security and performance.
- Check for Updates: Go to “Settings”> “System”> “Software Update” to see if there are any available updates.
- Download and Install: If updates are available, download and install them. Before starting the update, ensure your phone is connected to Wi-Fi and has sufficient battery life.
- Restart: After installing the update, your phone may need to restart.
Personalizing Your Kyocera Digno Phone
Personalizing your phone makes it truly yours. Here are some ways to customize your device:
Setting Up a Lock Screen:
- Go to Settings: Navigate to “Settings”> “Security”> “Screen Lock.”
- Choose a Method: Select a lock method, such as PIN, pattern, or password.
- Set Up: Follow the prompts to set up your lock screen.
Customizing the Home Screen:
- Wallpapers: Go to “Settings”> “Display”> “Wallpaper” to choose a new wallpaper.
- Widgets: Press and hold an empty area on the home screen to add widgets.
- App Icons: You can arrange or remove app icons by pressing and holding them and dragging them to the desired location.
Setting Up Email Accounts
If you use email regularly, setting up your email accounts on your Kyocera Digno phone is essential.
- Go to Email App: Open the email app on your phone.
- Add Account: Select “Add Account” and choose your email provider.
- Enter Credentials: Input your email address and password, then follow the prompts to complete the setup.
Installing Essential Apps
Your Kyocera Digno phone has essential apps, but you’ll likely want to add more to suit your needs.
- Open Google Play Store: Go to the Google Play Store app.
- Search for Apps: Use the search bar to find apps you want to install, such as social media, productivity, or entertainment apps.
- Install: Click “Install” to download and install the apps on your phone.
Backing Up Your Data
Regularly backing up your data ensures you don’t lose important information if anything happens to your phone.
- Google Backup: Go to “Settings”> “System”> “Backup” to enable Google Backup. This will save your app data, call history, contacts, and more to your Google account.
- Manual Backup: You can also back up your data manually by connecting your phone to a computer and transferring files.
Troubleshooting Common Issues
Even with a smooth setup, you might encounter some common issues. Here’s how to address them:
Phone Not Turning On:
- Check Battery: Ensure the battery is charged.
- Reset: Try holding the power button for 10-15 seconds to force a restart.
Wi-Fi Connection Problems:
- Restart Router: Restart your Wi-Fi router.
- Forget and Reconnect: Go to “Settings”> “Wi-Fi,” forget the network, and reconnect.
App Crashes:
- Update Apps: Ensure all your apps are updated to the latest version.
- Clear Cache: Go to “Settings”> “Apps,” select the problematic app, and clear its cache.
Understanding Your Kyocera Digno Phone’s Features
Your Kyocera Digno phone is packed with features that enhance your mobile experience. Understanding these features will help you get the most out of your device.
Battery Optimization:
- Battery Saver Mode: Activate Battery Saver mode through “Settings”> “Battery” to extend battery life when it’s running low.
- App Usage: Monitor which apps consume the most battery and adjust usage accordingly.
- Camera Settings:
- Resolution: Adjust the camera resolution for higher-quality photos through the app settings.
- Modes: Explore different camera modes, such as panorama, night mode, and HDR, to enhance your photography.
Storage Management:
- Storage Usage: You can check your storage usage by going to “Settings”> “Storage.” This will show you how much space is being used and by whom.
- Freeing Up Space: To free up space, delete unnecessary apps and files or move data to an SD card.
Optimizing Your Phone for Performance
Regularly optimizing its performance is essential to keep your Kyocera Digno phone running smoothly.
Clearing Cache:
- App Cache: Go to “Settings”> “Apps,” select an app, and clear its cache to free up space and improve performance.
- System Cache: Some phones allow you to clear the system cache from the recovery mode, which can resolve various issues.
Limiting Background Processes:
- Developer Options: Enable Developer Options by going to Settings> “About Phone” and tapping “Build Number” seven times. In Developer Options, you can limit background processes to reduce your phone’s load.
Regular Updates:
- System Updates: Regularly check for system updates to ensure your phone has the latest features and security patches.
- App Updates: Keep your apps updated through the Google Play Store for better performance and compatibility.
Setting Up Advanced Features
The Kyocera Digno phone has various advanced features that can enhance your user experience. Here’s how to set them up:
Fingerprint Sensor:
- Setup: Go to “Settings”> “Security”> “Fingerprint.” Follow the on-screen instructions to register your fingerprint.
- Use: Once set up, you can use the fingerprint sensor to unlock your phone, authorize purchases, and more.
Voice Control:
- Activate Voice Assistant: Navigate to “Settings”> “Google”> “Search, Assistant & Voice” to set up Google Assistant.
- Voice Match: Enable “Voice Match” to activate Google Assistant hands-free by saying, “Hey Google.”
NFC (Near Field Communication):
- Enable NFC: Go to “Settings”> “Connected devices”> “NFC” to turn on NFC.
- Use: NFC can be used for contactless payments, file sharing, or pairing with other devices.
Protecting Your Kyocera Digno Phone
Ensuring the security of your Kyocera Digno phone is crucial. Here are some steps to protect your device:
Screen Lock:
- PIN/Pattern/Password: To prevent unauthorized access, set up a screen lock. Go to “Settings”> “Security”> “Screen Lock” and choose your preferred method.
Find My Device:
- Activate: Enable “Find My Device” by going to “Settings”> “Security”> “Find My Device.” This feature lets you locate, lock, or wipe your phone remotely if it’s lost or stolen.
App Permissions:
- Review Permissions: Regularly review and manage app permissions by going to “Settings”> “Apps & notifications”> “App permissions.” This ensures that apps only access the data and features they need.
Connecting to Other Devices
Your Kyocera Digno phone can easily connect to devices like Bluetooth accessories, computers, and smart TVs.
Bluetooth Pairing:
- Enable Bluetooth: Go to “Settings”> “Connected devices”> “Bluetooth” and toggle it on.
- Pair Device: Select the device you want to pair with from the list of available Bluetooth devices and follow the on-screen prompts.
USB Connectivity:
- Transfer Files: Connect your phone to a computer using a USB cable. Choose “File Transfer” mode to transfer files between devices.
- Charging: Your phone will automatically charge when connected to a computer or another power source via USB.
Casting to a TV:
- Enable Casting: Go to “Settings”> “Connected devices”> “Cast” to enable screen casting.
- Select Device: To mirror your phone’s screen, choose your smart TV or other casting device from the available options.
Using the Kyocera Digno Phone for Productivity
Your Kyocera Digno phone can be a powerful tool for productivity. Here’s how to make the most of its features:
Calendar and Reminders:
- Google Calendar: Use Google Calendar to schedule appointments, set reminders, and organize your day. The app comes pre-installed on most Android devices.
- Reminders: Use the Google Assistant or the Reminders app to set reminders for important tasks.
Note-Taking:
- Google Keep: Use Google Keep for quick note-taking and organizing ideas. Using your Google account, you can sync your notes across devices.
- Voice Notes: Record voice notes using the built-in voice recorder app when typing isn’t convenient.
Document Management:
- Google Drive: Store and manage documents using Google Drive. You can upload files, share them with others, and access them from any internet-able device.
- Microsoft Office: Download Microsoft Office apps like Word, Excel, and PowerPoint from the Google Play Store to edit and create documents on the go.
Enhancing Your Multimedia Experience
Your Kyocera Digno phone has features to enhance your multimedia experience, whether listening to music, watching videos, or editing photos.
Music:
- Google Play Music/YouTube Music: These apps stream music, create playlists, and discover new songs.
- Offline Listening: Download music for offline listening to save data and enjoy music without an internet connection.
Video:
- Streaming Services: Download apps like Netflix, Hulu, or Amazon Prime Video to stream your favorite shows and movies.
- Video Playback: The built-in video player supports various formats. You can use it to watch videos stored on your phone or SD card.
Photo Editing:
- Google Photos: Use Google Photos to edit and organize your pictures. The app offers tools for cropping, adjusting colors, and applying filters.
- Third-Party Apps: Download photo editing apps like Adobe Lightroom or Snapseed for more advanced editing options.
Troubleshooting Advanced Issues
If you encounter more complex issues with your Kyocera Digno phone, here’s how to troubleshoot them:
Overheating:
- Close Apps: Close unused apps running in the background that may be causing the phone to overheat.
- Avoid Direct Sunlight: Keep your phone out of direct sunlight or hot environments to prevent overheating.
Battery Drain:
- Battery Usage: You can check which apps are consuming the most battery by going to “Settings”> “Battery”> “Battery usage.”
- Disable Unnecessary Features: To conserve battery life, turn off features like Bluetooth, GPS, and NFC when not in use.
Connectivity Issues:
- Reset Network Settings: If you’re having trouble with Wi-Fi, Bluetooth, or mobile data, try resetting the network settings. Go to “Settings”> “System”> “Reset options”> “Reset Wi-Fi, mobile & Bluetooth.”
- Contact Support: If issues persist, contact Kyocera’s customer support for assistance.
Conclusion
Setting up your Kyocera Digno phone is a rewarding process that allows you to customize your device to fit your needs. From unboxing and initial setup to exploring advanced features and troubleshooting, this guide has covered all the steps to ensure you get the most out of your phone. Remember, setting up your phone correctly will enhance your user experience and help you fully enjoy everything your Kyocera Digno offers.
Whether you’re new to smartphones or an experienced user, this guide provides the tools and knowledge to navigate the setup process confidently. Enjoy your new Kyocera Digno phone, and explore its capabilities to discover how it can enrich your life. Also read: How to Scrape Zillow with Phone Numbers?
Frequently Asked Questions (FAQs)
How do I perform a factory reset on my Kyocera Digno phone?
Go to “Settings”> “System”> “Reset options”> “Erase all data (factory reset).” This will restore your phone to its original settings. Make sure to back up your data before performing a reset.
Can I use my Kyocera Digno phone while it’s charging?
Yes, you can use your phone while it’s charging. However, for optimal battery health, it’s recommended to let the phone charge undisturbed, especially when it’s at a low battery level.
How do I transfer data from my old phone to my Kyocera Digno phone?
You can transfer data using Google’s backup and restore feature, Bluetooth, or third-party apps like “Samsung Smart Switch” if you’re transferring from a Samsung device. You can also transfer files manually using a USB cable.
What should I do if my Kyocera Digno phone is running slow?
If your phone is running slow, try clearing the cache, uninstalling unused apps, or performing a factory reset. You can also limit background processes through the Developer Options.
How do I take a screenshot on my Kyocera Digno phone?
Press and hold the power and volume down buttons simultaneously for a couple of seconds. The screen will flash, indicating a screenshot has been taken.
Can I expand the storage on my Kyocera Digno phone?
You can expand the storage by inserting a microSD card into the SD card slot. This allows you to store additional photos, videos, and apps.